
How To Free Motion Quilt Tutorial – Intermediate
A How To Free Motion Quilt Tutorial, And You’re About To Have Some Fun!
This is the free motion quilt tutorial shows:
- The best threads for motion quilting.
- How to apply the batting.
- Free motion quilting – decorative stitching- edge finishing design.
Solid color rayon, and solid color polyester trilobal thread, they both have a wonderful sheen.
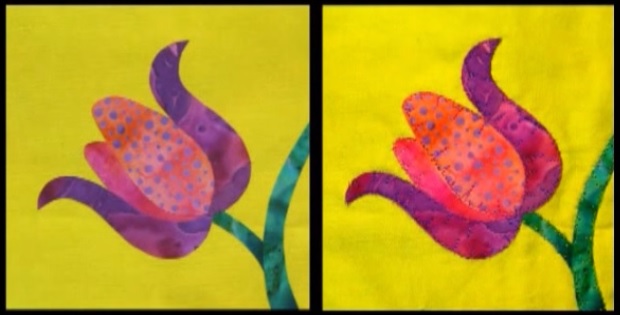
In this tutorial, a piece of fabric is used where a beautiful flower applique has been fused onto the fabric.
Use wool batting, it will give you more block… or pouffe to finished look. Pin the applique piece to the batting and trim the excess away.
To start sewing: The machine is set up to straight stitch, and in free motion mode. You’ll be stitching small v-shapes within the applique line. Vary the size of the v-shapes. Most are the same size, which are quite small, (see the video) some are medium, and then make the occasional larger one, but being sure to always stay within the line of the applique. Pin your work as you go along.
After completing the free motion quilting, carefully trim away the excess batting, taking care not to cut into your stitching.
This is decorative stitching. I loved this video as it shows everything in detail.The finished product looks so difficult, yet when you see the tutorial, it is so much more simple than you can imagine.
How To Free Motion Quilt Tutorial 1 of 2
How To Free Motion Quilt Tutorial 2
This free motion tutorial shows:
- Using the correct thread.
- Decorative stitching on the background fabric. Adding grapevine decorative stitches flowing from the stem.
- Finishing off thread tails.
- Fusing the piece to a background fabric.
Before stitching, stabilize the fabric, or it will pucker up while stitching. Use an iron-on tear away stabilizer ( we used ‘Sulky’ iron-on tear away stabilizer). Iron it onto the back of the fabric, where you intend to stitch.
The thread: You really want this design to stand out. Use a thread as heavy as possible, such as a size 12 embroidery thread, or use a twelve weight silky blended thread, which is a cotton thread that’s very heavy. Thin thread will look weak and spindly, spoiling the look and feel.
The stitching: Starting from the side of the stem, stitch a curled, looped design. Do the same on the opposite side of the stem.
Finishing thread tails: Use a large needle with a really big eye. Thread the needle with the thread tails and pull the needle to the back of the fabric. Once all threads are pulled to the back, tie them in knots, and cut them off.
Next, gently tear away the stabilizer. Use tweezers to grab hold of the smaller pieces.
Using a flexible curved ruler, draw a curved line all the way around the border of the fabric. These will become the edge lines to shape your applique. Apply ‘Liquid Stitch’ a permanent fabric glue that’s heat activated. Feed a small amount of the Liquid Stitch following the traced curvy line. Flatten the glue a little. The glue will dry to a clear color. Once dry, cut along the glue line. When cutting, follow the line of the glue , but cut in the middle of the line. This will prevent fabric fraying.
Using an iron, fuse the applique piece onto your background fabric. Press the iron down firmly but gently, all the way around on the glued edge.
Full the full Free Motion Quilt Tutorial watch the detailed video below.
How To Free Motion Quilt Tutorial 2
Images: Youtube Patsy Thompson


