
Jelly Strips Lone Star Splash Out On Color
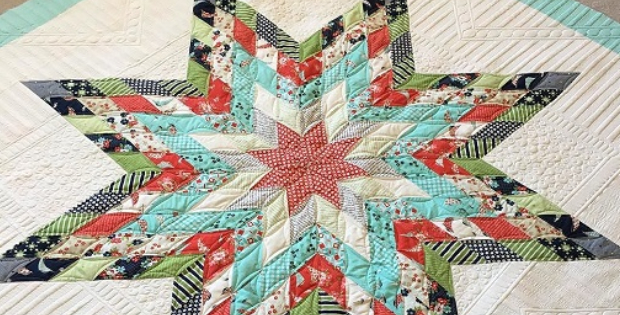
This Jelly Roll Lone Star Without Y-Seams Is So Easy.
If you have not been a Lone Star fan before, get out your most loved jelly roll. This beautiful design will certainly get second glances. No fussing with paper piecing 200 diamonds, and no Y-seams to sew the star together, make your own Star for a striking wall hanging or throw.
Color placement becomes easy following Terri Ann’s instructions to start by putting together similar color jelly strips. Next, separate the colors into 5 groups. It’s amazing how the colorway just ‘works out’, no matter which jelly roll you’ve chosen.


Using this technique makes something that would have been tedious, totally accessible, and to increase the size you can customize the border. Starch the jelly roll strips before starting. It also helps towards making bias-cut points match up. Putting safety pins in the starting point of each strip to stay organized makes the entire project so much easier.
One jelly roll and a little yardage, enough to cut 4 x 11″ squares and 4 x 15″ squares for the background, makes a small throw or small wall hanging. Finished size 59″ x 59″. There are additional instructions for 5 Lone Star sizes in Terri Anns tutorial.


