
Quilted Potholder Tutorial – For Busy Quilters
Quilted Potholder Tutorial Done In Time For Dinner
It’s not often you get to read a quilted potholder tutorial, sew the darn thing and get to use it at dinner time. Well this is the one. The end comment was even,,,”Now go make 100 more…!” The fabric is a kitchen delight! I always love citrus for anything kitchen. It’s a bonus to find small quilty things to make. It’s such a good feel to use up favorite fabrics that pile up and space you out… BUT you would NEVER have the heart to throw away. I have a hard time even giving my gems away, even to someone I like!
So…
All seam allowances are 1/4″.
Here is what you will need:
* 4 1/4″ square of focal print (keep in mind that if it is directional, like mine, the square should be cut on the bias)
* 1 – 3 7/8″ square- green polka dot 2 – 3 7/8″ squares- orange
* 4 – 3 1/8″ squares- yellow 2″ wide by approximately 42″ long strip of striped fabric for binding
* 1 1/2″ x 4″ green polka dot (for loop) 9″ square backing fabric (I used the focal print) 9″ square insulated batting.
Start by cutting the green square into quarters diagonally, then repeat with the orange squares. Stitch together to make up your design.

Start forming the fabric sections following the tutorial.

Put the pieces together to make up a square, and put the batting in between.

Stitch up.

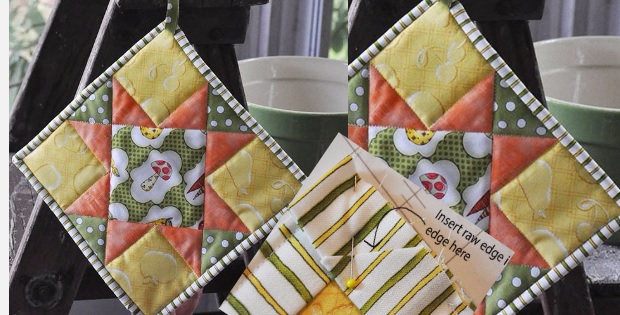
Now for the edging…

Fold over and stitch.

And we have our quilted potholder!

I was thinking you could probably make it another size smaller for soup mugs and cups. The option of sizes are endless. This is the type of project I like to make for my stockpile of ready-to-go gifts such as when invited to someone’s home for a dinner party.
Have fun making your quilted potholder.


