
6 Tips On How To Make The Perfect Quilt On Point

So Easy With Charm Squares
You may find there’s a small learning curve for the first time you make a quilt on point. You’re still sewing together rows of patchwork squares, however using triangles for the side setting which are not cut on the bias in order to prevent a wavy edge, and understanding which direction to lay the blocks to nest seams, will ensure great results. This sweet charm square baby quilt is a breeze since there is no sashing. 5″ squares provide a delightful show of prints, which can be be put on display for a lap quilt, over the sofa, or the bedroom.
On point quilts may look challenging, however it’s just a matter of laying rows out diagonally and placing a triangle at the beginning and end of the row. You’ll still get a straight edge of the quilt top. Side setting triangles and corners are cut from a larger size square.
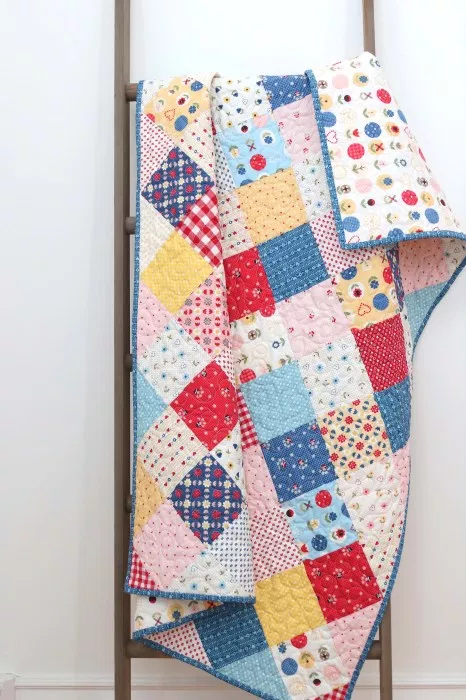
This baby quilt requires only 5″ x 5″ square, perfect for your favorite charm pack, or 2, since 83 x 5″ squares are needed to make a 38″ x 50″ crib size. Plus a little yardage for cutting the side-setting triangles, or perhaps from 3 to 4 fat quarters from the collection. It’s a great start if you have never sewn a quilt with quilt blocks on point, or perhaps have not seen the results you expected.
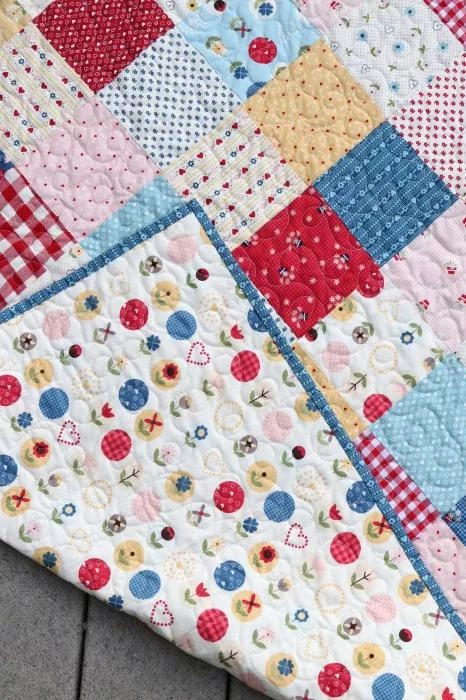
Amy Smart from Diary Of A Quilter explains how to press the seams on the odd numbered rows to the right, and the seams on the even numbered rows to the left, causing the seams to lock snugly when you go to sew the rows together, helping your points match up nicely. These tips on how to sew diagonal rows of diamond shaped quilt blocks, how to rotate directions depending on where they lie on each specific row, are invaluable, and does not require any extra time or effort. You’ll love the result!


