
Great Ideas To Nest Seams For Perfect Intersections
How To Press Seams So They ‘Lock’ Together.
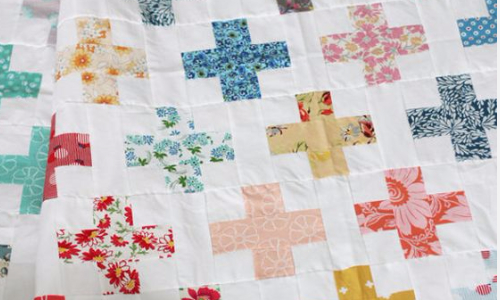
I love the nine patch. It’s fun and creative using color placement to change the pattern, and is a super easy way to construct a quilt top. It’s a good beginner block to practice piecing skills, and pressing seams so that they ‘nest’ to ensure that intersections line up perfectly.
As a beginner you’ll more than likely fall in love with a nine patch as I did when playing around with charms. Move the squares around and with a little color play, easily create a cross block. Easily change the pattern and add a row to make a 12 patch block.
Cluck Cluck Sew Beginner Pattern Etsy
At this point you’re thinking the design is great. You love the color placement, ready for stitching. Use this guideline to press the seams. Nesting seams means aligning the seams of each row so that they line up really neat, and the result is a perfect block just like the ones in the quilting magazines! I loved this mini tutorial on nesting seams by Liz and Elizabeth Evans.
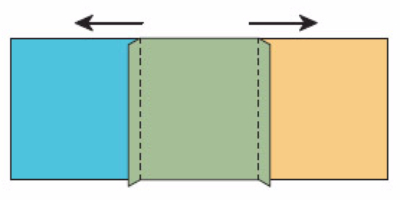
Start with row one of your block. Press the seams in opposite directions away from the center block.
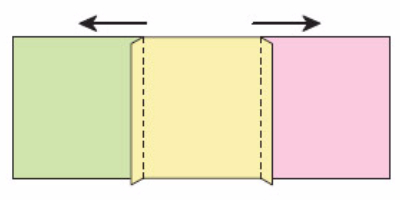
In row two press the seams towards the center block.
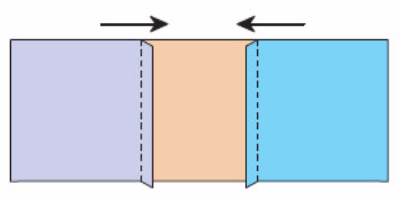
Then row three press the seams away from the center block, much like row one.
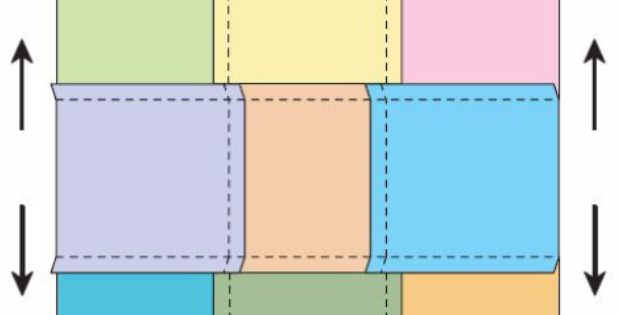
When joining the rows place the blocks so that the seams of each row alternate. Then as shown in this nine patch, press the row seams away from the center row.
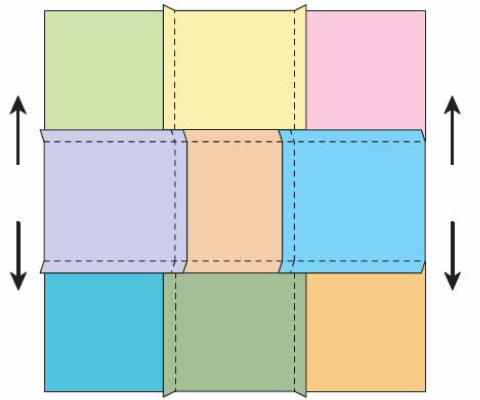
Nesting your seams starts with the way you press them. Pressing seams to one side ‘nests’ seams resulting in perfect intersections without even having to use pins. Plan ahead ensuring that at each intersection the seams are pressed in opposite directions. Place two rows right sides together and at the first intersection, fudge the strips between your fingers until you feel them ‘lock’ together. They should fit together well and quite snug since you pressed the seams in opposite directions. This tight fit is more important than whether or not the raw edges meet perfectly at the starting edge.
Use pins if you prefer, however when stitching, press down with your finger on the intersection to keep it ‘locked’ right up until the needle goes into it catching that first stitch. Continue to stitch to the next intersection pressing down with your finger to ‘lock’ the nested seam. The blocks are so neat and crisp when the intersections meet up. The fabric even looks different.
There are more quick tips and lessons even for experienced quilters in Liz and Elizabeth Evans ‘Simple Simons Guide To Patchwork Quilting’ book. How to press blocks, how to square up quilt blocks for perfect cuts, and binding, plus 21 patchwork projects.
The book is available for purchase a great reference book to have on the shelf.


