
How To Save Your Points When Quilting With Triangles
And How To Sew Stretchy Triangles
Quilts with triangles provide a lot of fun, and room to create a versatile design that makes fabric shine. However, a triangle is likely to have at one edge that is cut on the bias, and together with a narrow, pointy tip, makes for a stretchy block. Try these simple tips that will help to get perfect points when piecing triangles.
It’s important to keep in mind that triangles are stretchy and should be handled as little as possible. So here’s what you could try. When piecing a triangle block, allow it to flow through the sewing machine without pushing or pulling.
To get perfect points, a persistent quarter inch seam is essential. Once you have your layout and you totally love it, try the following steps to start piecing.
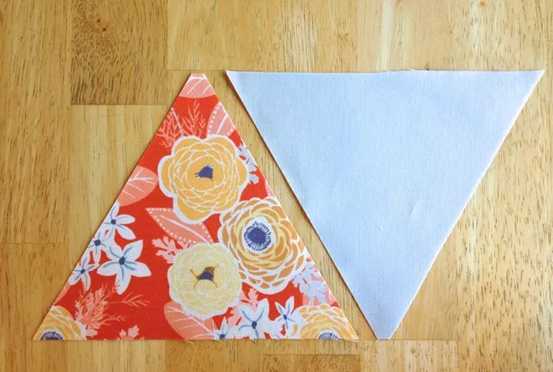
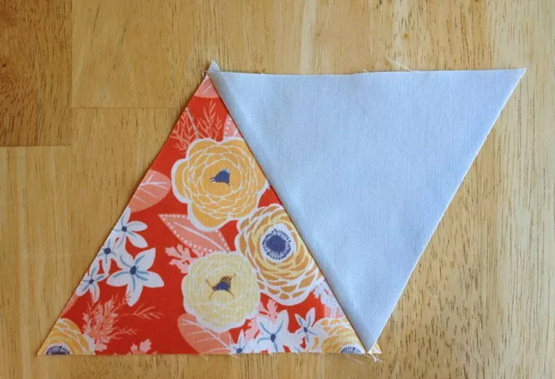
As part of a Triangle quilt a long, Paula of the Sassy Quilter provided some great tips to get perfect points. When preparing to piece, lay out the first two triangles. The first triangle should have the blunt tip pointing up, and the second triangle, the blunt tip pointing down. Then flip them together with right sides facing and pin.
Paula explains what to watch for before stitching:
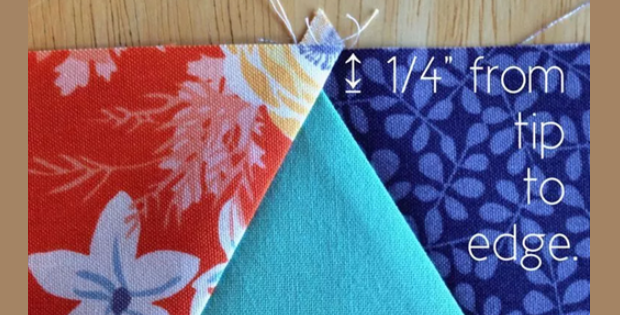
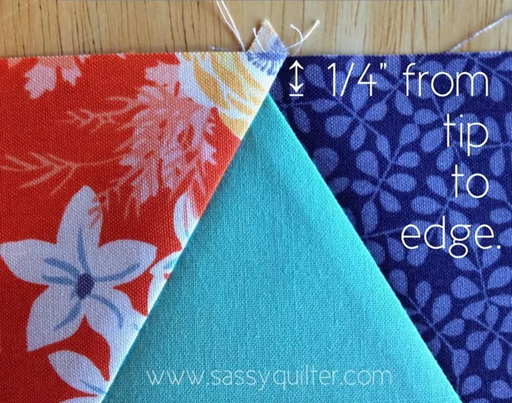
Make sure all three points are lined up and not just the two on the side you are piecing. Pin along the side you will be sewing on to add stability to your pieces. Then sew a 1/4″ seam, be consistent. If your seam is correct your line of stitches should land right where your trimmed tip and the other corner come together.
Then gently press using an up and down motion, and not side to side, remember the blocks are ‘stretchy’! Lay out the next pair and repeat, then stitch the triangle pairs together.
Paula mentions:
Your tips will line up on one end and the other will have the 1/4″ tip beyond the triangle. This makes a “V” shape where your sewing line should start. If one end is not lining up properly…you probably have the other wrong. When you are done you should have 1/4″ of fabric past each point along your row of triangles. This means you will have enough room for your seam allowance when joining rows. Check for this each time you press open your piecing to make sure.
Even after sewing, handle the rows with care, and store the rows flat, while the quilt top is in progress.
Paula demonstrates each step in her free picture tutorial which shows exactly how to put together triangles before stitching, and how beautifully the points match up.


