
Twisted Triangles Template – Save Your Fabric, Try This First
Twisted Triangles Template – Paper Try Out That Might Save You Major Frustrations.
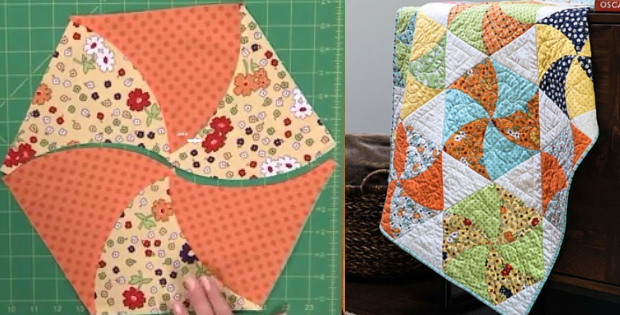
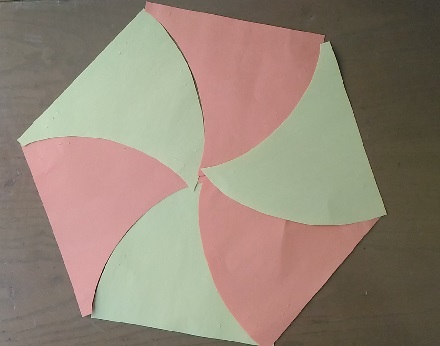
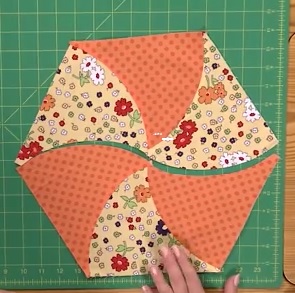
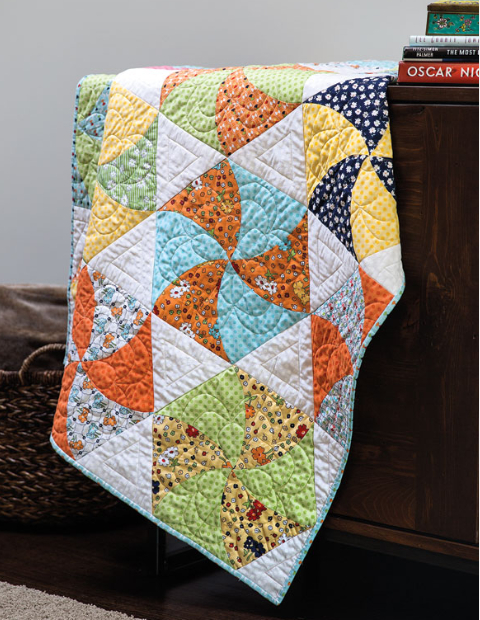
This twisted triangles template is so inviting. It’s a twisted triangle that’s almost like a windmill. I also love those triangles between the twisted triangles block using a 60 degree pyramid ruler. I’m sold! All that’s left to do now is choose the fabric! When I watched the Sew Easy Twisted Triangles video from Fons and Porter, it looked so easy. I imagined all sorts of projects, from quilts to table toppers.
With just enough quilting experience behind me, I wasn’t totally convinced about getting those twisted triangles right. I thought matching up the triangles seams, and getting the block to lie flat, might just turn out to be a bit of a challenge. So I decided to try it out with paper first. That in itself had it’s own set of problems, since paper is not as forgiving as fabric when you’re trying to make edges match up. I did the exercise anyway, and these are the pointers I wanted to share.

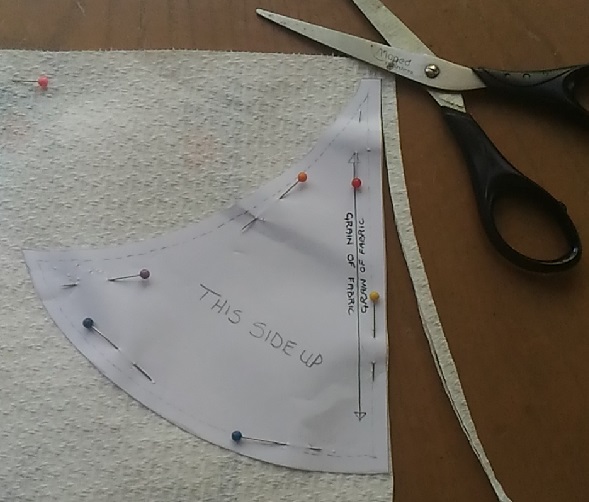
First up, the Twisted Triangles template does not have a fabric grain arrow, as a paper pattern does. When you position the template on the fabric, place the straight edge of the template with the grain of the fabric.

Be careful not to end up cutting on the bias as the fabric will look ‘stretched’ after the triangles have been stitched, and there is no amount of ironing or pressing that’s going fix that! Be sure to not go even slightly off the straight grain. The safest cutting method is with a rotary cutter as the fabric and template is flat on a cutting mat.
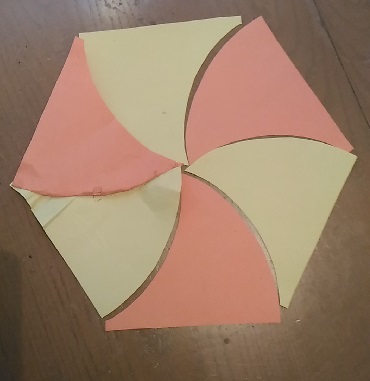
I made up a paper template to play around with, and pinned the paper template to the trial paper (the would be fabric). It was near impossible to keep the triangle template flat once pinned. It definitely would not work trying that with fabric. You would benefit in using the actual Fons and Porter Twisted Triangles template. Anyway, for now, this was ok for the try out.
All in all, the block is very easy. When stitching the triangles together, be sure to stitch very slowly and literally only three or four stitches at a time, holding the seams together for the next three or four stitches, and so on. It feels slow, but goes quite quickly so don’t get impatient. It’s worth spending the time.
The Fons and Porter video suggests folding the triangle piece in half and finger pressing to get a center mark for each triangle. Now, with matching up the ends to get the center marks, you could easily get confused as to which end should match up to get the center mark. It could be out by as much as 2 to 3mm if you’re not careful. In turn the entire triangle block would be totally off center. You’ll see my mistake further down.
My twisted triangles template paper try out really made some important points clear to me. I wouldn’t want to be faced with those challenges after having cut my fabric. If you want to save yourself the time of trying out the paper exercise, check mine out. Hope it helps anyone who is about ready to give this pattern a try, or, if anyone is struggling with the triangles, I hope this might also clear some things up.
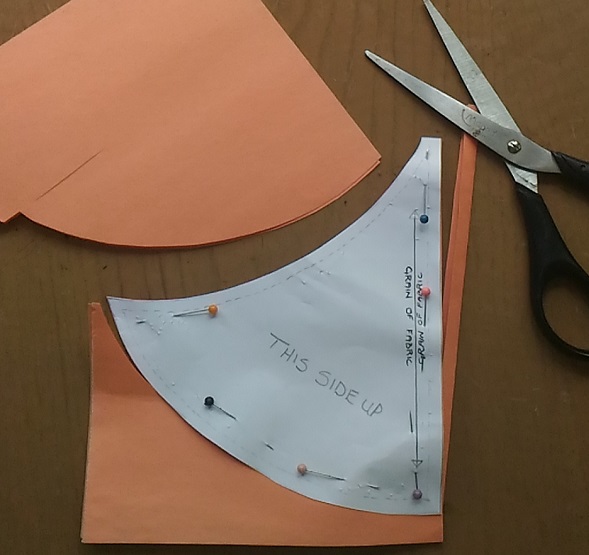
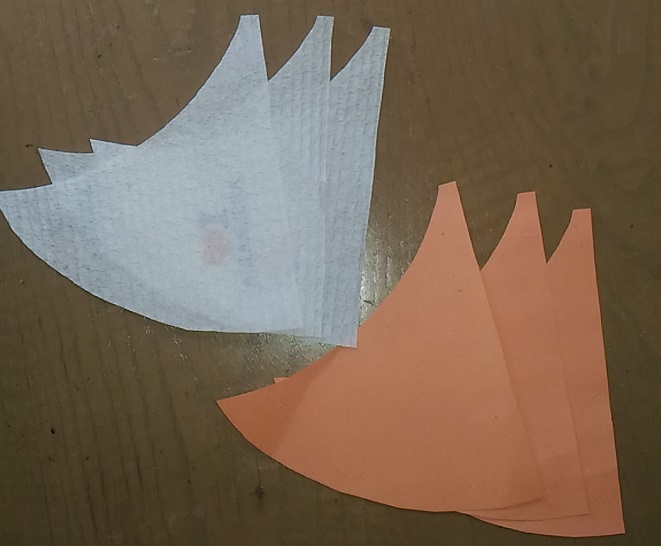
Some pieces were cut using paper towels. Then I switched to craft paper. The paper towels might have been better because the paper towels are kind of ‘flexible’ like fabric.
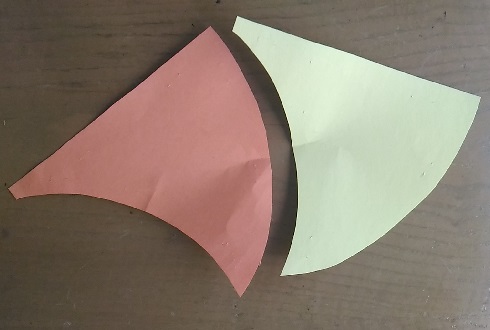
First, I made a twisted triangles template in paper.

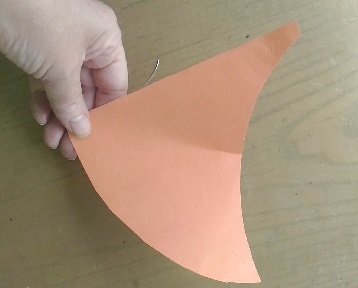
Cut 3 triangles from a paper towel sheet.
Then another 3 in a different color…
6 triangles in total…
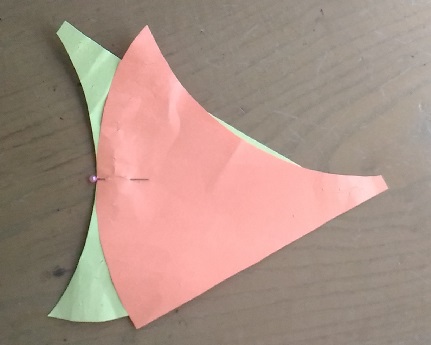
Position the triangles to get the idea… It was fun..
Separate two triangles out.

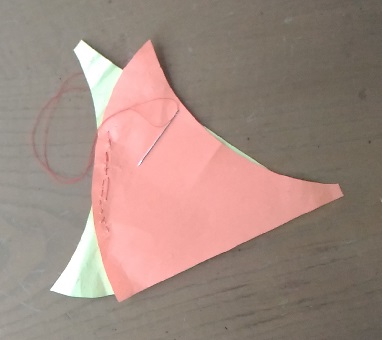
Fold pieces in half to get the center mark. Make sure you get the right ends meeting otherwise the seams won’t match up when stitching, hence, trying to force the fabric while stitching to get the seams right.
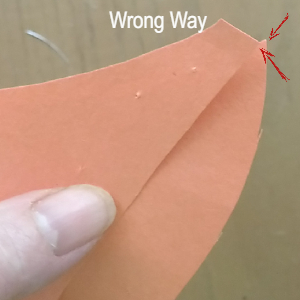
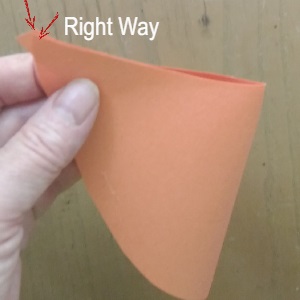
Tip: When working with pieces always make sure the straight edge is on the outside at all times. The first time I folded it I was distracted by something else. Then when I folded the piece I was folding the straight edge and getting the center mark in the wrong place. The center mark must occur in the ‘smile’ part.
Put right sides together of the would be fabric.
My attempt at stitching the paper… 🙁
Anyhow, it kind of gave me the feel, trying to get the paper seam edges to match…
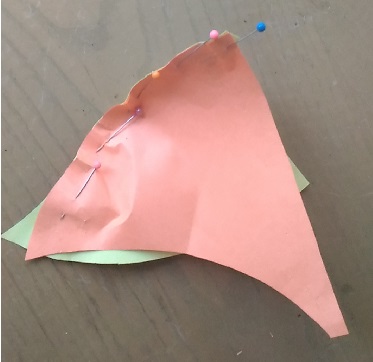
… and I kind of guessed how it would match up. It matched! I can do this!
For the pattern, start with 2 seven inch strips and cut 3 triangles of one fabric, and 3 triangles from another. With fabric right side up, place the template on the fabric. It’s important that the template is right side up. Take care that you cut accurately. The fabric must not move at all when cutting all sides of the triangle.
Cut 3 of each color. Use a small rotary cutter making it much easier to cut close to the template, and around the curves.
When stitching triangles be sure that the ‘smile’ is on top. From there it will just fall into place easily. When pressing, press towards the ‘smile’. Stitch two triangles together first, then the third. Then stitch two together and add the third. You will have two sets of three.
With fabric right sides together, stitch one half first, then the second half. Move slowly, doing three or four stitches at a time and holding seams together until stitching is complete.
Watch the video, with the paper try out in mind. Hope this helps. There is a second video below this one on Cutting 60 Degree Pyramids by Fons & Porter.
A perfect addition to the twisted triangles template video is this video, Sew Easy: Cutting 60 Degree Pyramids. It’s about how to use the 60 degree Pyramid ruler, cutting 60 degree Pyramids.
Get The Small Rotary Cutter Here
The Cutting Mat Here
The Pyramid Ruler By Fons and Porter
The Triangle Template Here
Fons and Porter Twisted Triangles Quilt Pattern Here


