
A Classic Decorative Pillow Simple To Sew
Appealing Decorative Pillow With An Edge
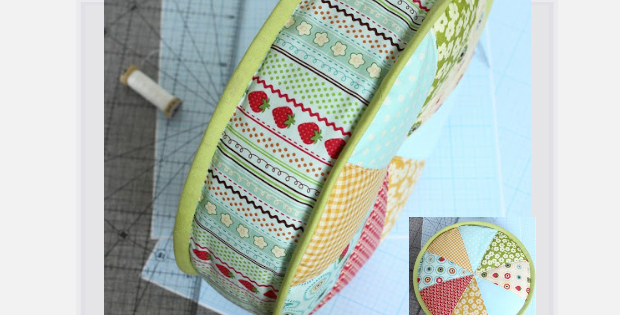
This pillow looks so impressive yet it was amazing to see that the pattern starts off with drawing a 30cm diameter circle on a piece of paper. These scatter pillows look so classy, like the ones you see in decor magazines. Follow the step by step tutorial to make one or a set of two decorative pillows for a new splash of color in the lounge room. Or a great throw pillow for the bench on the porch.
Use trendy fabric for a modern look. Any fabric would look great, from florals to pinstripes, since the style of this pillow cover is very appealing. The segments and edges require small cuts of fabric so fabric scraps would do it for sure. Personalize a feature area of the pillow by fussy cutting the segments for repeat fabric patterns. Match up with a solid border to compliment and enhance prints.
The pattern is so creative and surprisingly easy. The binding is hand stitched and very easy to do.
The starting point is always inspiring. Once you know where to start, the rest simply unfolds as you go. Make this pillow as an addition to your existing throw pillows using complimentary colors and fabric.
The details below are a brief overview of the pattern. It may give sufficient details to work from this tutorial. Estimated fabric requirements to start planning.
- Scraps of colored fabrics for the front and rear side airbags
- Fabric for the sides (length 110 cm width and 10 cm width )
- For the edging/binding (total length inlay about 200 cm )
- The fabric for the lining (about 45 cm and a width of 110 cm )
- Batting
- Zip closure more than 32 long cm
All seams 1cm.
To get started, cut out the circle and fold it in half, then in half again, and in half again to create eight segments. Cut one paper segment out and use as the template to cut the fabric. Cut the fabric allowing a one seam allowance around the template. Take note to cut fabric with grainline as shown. Cut eight. Stitch two segments together as show.

Stitch two segments together, fabric right sides together, and complete to make a set of four.

Fabric right sides together stitch two sets together.

Press and trim bunny ears.

Stitch together to form a complete circle. You will be making two of these fabric circles for the top side of the pillow. One will serve as the lining for the inside of the pillow.

Layer with batting. Baste all three layers. Then stitch along the line of each segment. Trim any excess if necessary.

For the base of the pillow follow the same steps, except this time the circles with remain half circles.

Stitch the zipper in.

Top view

Layer the sides with batting. Pin, mark and quarter.

Evenly distribute the side fabric on the pillow top. Secure with basting stitches. Remove pins. Stitch to secure.

For the edging cut a strip of fabric width of 4.5 cm and 200cm length. Stitch as for binding for a continuos length.

Attach to the outside of the pillow top.

Fold over and hand stitch to finish.

Attach the zippered layer the same way as the pillow top. Attach edging. Fill with a pillow form.

Done!


There is a more detailed pattern tutorial available. The instructions are not in english. Simply wait for the “translate”
prompt. Read the full pattern instructions before starting.


