Quilting Fabric Scrap Storage And With Scraps Ready To Use

If You Love To Sew Scrappy
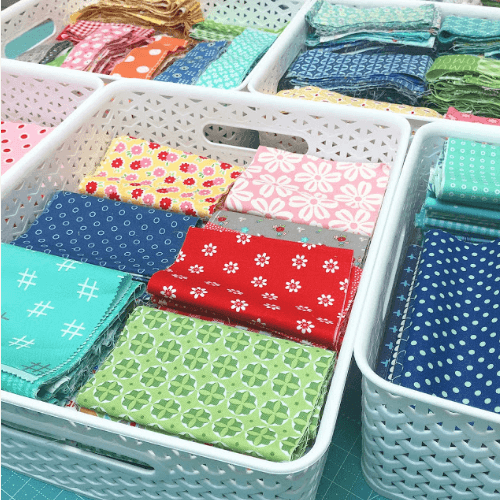
The next time you need fabric for a project, the thought of having to go through a messy pile before beginning an exciting project dampens your creative enthusiasm. Once trays/baskets are sorted and marked, any future scraps are easily placed reducing a build up of scraps that are constantly pushed into a random pile.
Reduce that constantly overflowing scrap basket by cutting fabric scraps and storing them ready to use. These neat ideas are perfect for quilting scraps and ensure almost every scrap is put to good use. Start by narrowing down to these 6 sizes commonly used for quilting projects.

In Lori Holts Scrappy Project Planner she has a great idea on “Breaking Up Your Scraps”, where she suggests setting up small baskets or bins, and dividing them up by size. Start by taking a piece of scrap fabric and cut a straight edge. Then measure to see what size scrap you could cut from that piece.
The sizes Lori Holt suggests are:-
1 1/2 ” strips
2 1/2″ strips
2 1/2″ squares
3 1/2″ strips
5″ strips
7″ strips

Get baskets and label them for these 6 sizes. Start by cutting a straight edge first to help you to see the size you could get from an awkward looking left over. Then cut to the nearest size of any of the ones mentioned. If a left over is as large as a fat eighth, perhaps it should be kept at that size for the right project. If there are pieces that you just love, and you know you will use in a lot of favorite projects, put that into the ‘Sew Happy Scraps’ basket!

Lori Holts Scrappy Project Planner is designed around the ‘Sew Emma’ patterns and there’s lots of room in the organized planner where you can create your own projects using your scraps. There are great tips for storing left over binding too. The Scrappy Planner, available for sale, also includes 6 fun scrappy patterns!


